· Digital Footprint Check · Content Marketing · 15 min read
How to Block Apps on Ipad: Your 2026 Guide
Discover how to block apps on iPad effectively. This 2026 guide covers Screen Time, Guided Access, and more to secure your device for all users.
You hand over the iPad so your child can use a reading app for twenty minutes. A little later, you notice the screen has changed. They’re in a browser, tapping through videos, prompts, ads, and in-app purchase screens you never meant them to see.
Adults run into the same problem for different reasons. A work iPad turns into a distraction machine. A shared family device becomes a privacy risk. A company-owned tablet ends up with apps that don’t belong anywhere near internal documents or client accounts.
That’s why learning how to block apps on iPad matters. It’s not just about saying no to games or social media. It’s about controlling access, reducing privacy exposure, and making the device fit its real purpose.
Why Blocking Apps on Your iPad Matters More Than Ever
An iPad can be a school tool, a work terminal, a travel screen, a drawing studio, or a babysitter in a waiting room. The problem is that all of those uses live on the same device, and the wrong app at the wrong moment can undo the benefit fast.
For parents, the risk usually starts with exposure. A child opens Safari, follows a link from a game, and suddenly they’re outside the safer experience you thought you set up. For teens, the issue might be social pressure, messaging, or account privacy. If you want a good starting point for the bigger picture, this guide on protecting children online is worth reading alongside device settings.
For adults, blocked apps can support focus just as much as safety. If your iPad is supposed to be for class notes, field work, or business travel, easy access to entertainment apps can chip away at attention. That’s one reason many families pair technical controls with habit changes like the Playz tips for digital wellness, especially when they want rules that feel sustainable instead of punitive.
Different goals need different blocking methods
Not everyone is trying to do the same thing:
- Parents often want to stop access to certain apps, prevent reinstalling them, and limit web exposure.
- Students and professionals may want friction around distracting apps without locking down the whole device.
- Employers usually care about data handling, approved apps, and predictable device use.
- Anyone sharing an iPad may want temporary lockdown so another person can use one app without seeing the rest.
Blocking an app is rarely just about the app itself. It’s usually about what the app can reach, collect, expose, or interrupt.
That’s the mindset that makes Apple’s tools easier to understand. Some settings hide or restrict access. Some limit time. Some lock the iPad into one app. The strongest setup depends on whether you’re protecting a child, protecting your own attention, or protecting work data.
Using Screen Time for Everyday App Control
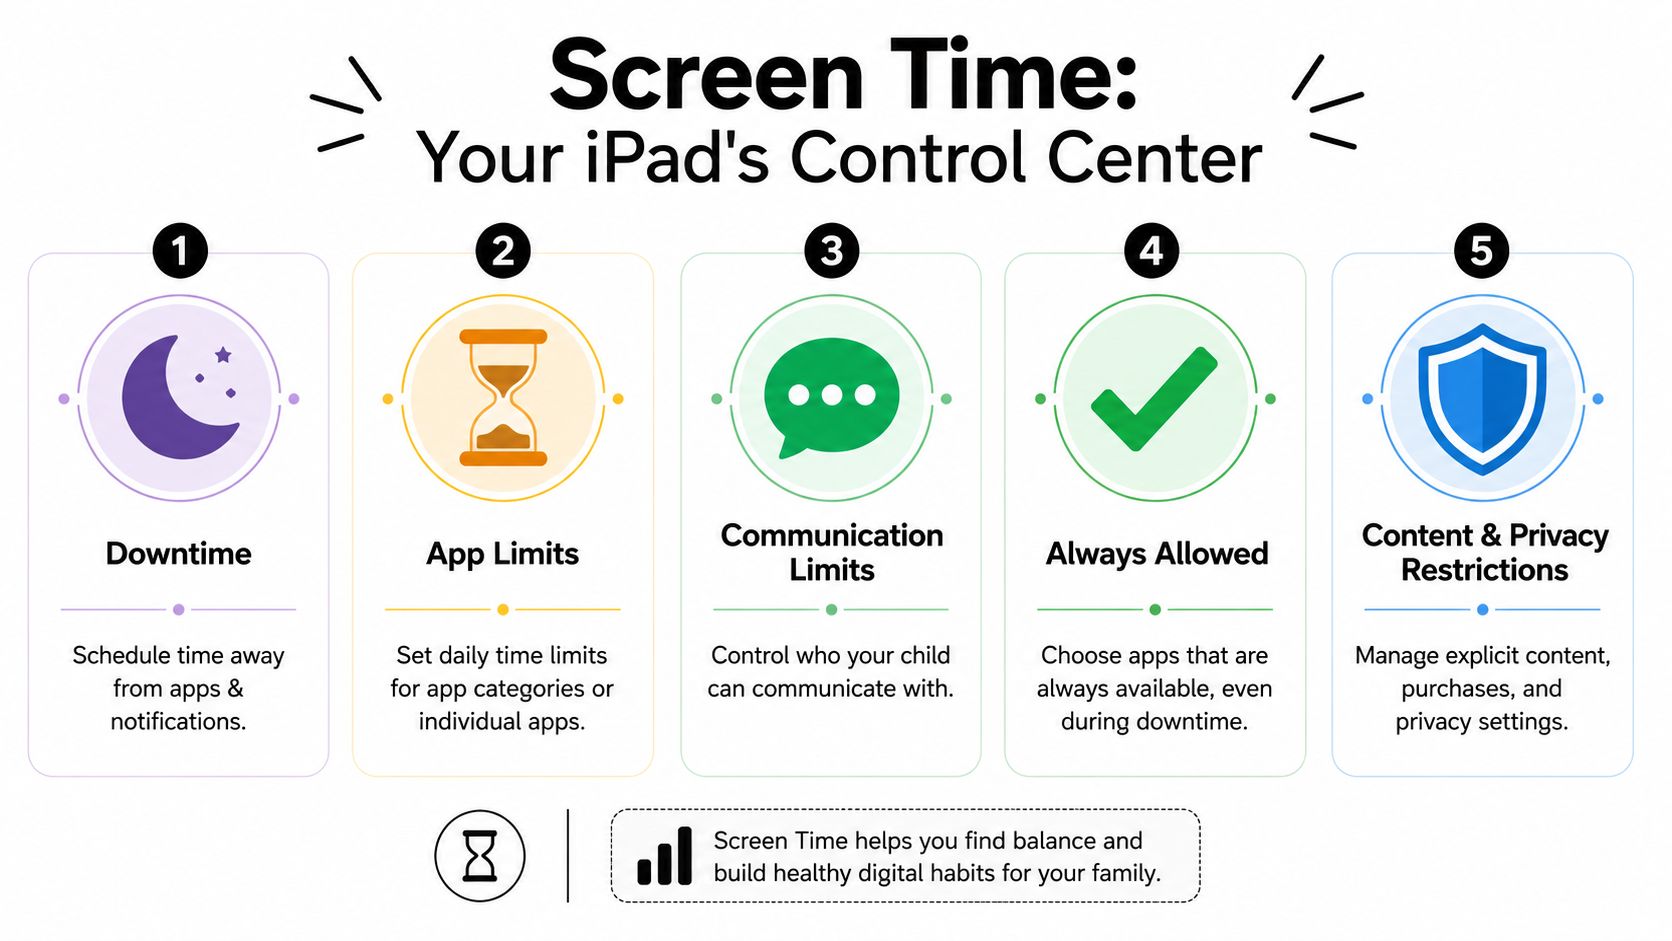
If you want one built-in place to start, use Screen Time. Apple documents it as the place to set safety limits and privacy protections by blocking content, purchases, apps, features, and websites through Screen Time and Content & Privacy Restrictions on iPad.
Start with the setting that actually enforces access
The most dependable path for built-in app blocking is Settings > Screen Time > Content & Privacy Restrictions > Allowed Apps & Features. Apple also documents that this should be paired with iTunes & App Store Purchases > Installing Apps > Don’t Allow so a user can’t put the app back on the device through Apple’s Screen Time restriction steps.
That pairing matters because many people assume removing an icon or deleting an app is enough. It usually isn’t. If installation is still allowed, the block has a hole in it.
The first thing to set is the passcode
Before you tweak individual settings, set a Screen Time passcode that the other user doesn’t know. Without that, the rest of the work is weak. A child who knows the code can undo limits. A distracted adult can override their own boundaries in seconds. On a shared device, one curious person can wipe out the rules for everyone else.
Use a passcode that isn’t the same as the device access code. Keep it separate. Treat it like an admin control, not a convenience setting.
What to change inside Content and Privacy Restrictions
This area is best when your goal is real control, not just encouragement.
You can use it to:
- Restrict built-in apps and features so certain Apple apps or system features aren’t available.
- Control purchases and installs so blocked apps can’t be reinstalled easily.
- Limit media, web, and game settings when the app issue is really a content access issue.
- Reduce privacy exposure by closing off routes to downloads, browsing, and account changes.
A common parent setup is simple. Turn on Content & Privacy Restrictions, disable what shouldn’t be available, then lock down app installs. That makes the iPad feel much more intentional.
App Limits works differently
App Limits is useful when you don’t want a hard ban. It lets you choose a specific app or category and set a daily maximum. Internet Matters notes that you can also turn on Block at End of Limit so access stops when the time runs out in its Apple iPhone and iPad parental control guide.
That’s a better fit when the app itself isn’t always a problem. Maybe you’re okay with gaming after homework, or social apps only after work is done. It’s less about prohibition and more about structure.
Practical rule: Use Content & Privacy Restrictions when access itself is the risk. Use App Limits when overuse is the problem.
A quick comparison of your options
| Method | Best For | How it Works | Bypass Risk |
|---|---|---|---|
| Content & Privacy Restrictions | Parents, shared devices, stricter control | Restricts apps, features, purchases, and related settings | Lower if passcode is protected and installs are blocked |
| App Limits | Focus, routines, softer family rules | Sets daily time caps on apps or categories | Higher if the user knows the passcode or can request more time |
| Installing Apps set to Don’t Allow | Preventing re-downloads | Stops new app installs and reinstalls | Lower when paired with other Screen Time controls |
| Removing apps from Home Screen only | Decluttering | Hides easy access but doesn’t enforce a true block | High |
| Deleting an app without restrictions | Temporary cleanup | Removes the app until someone reinstalls it | High |
Where people get confused
A lot of frustration comes from expecting one Screen Time setting to do everything. It won’t.
If your child keeps getting back into an app, ask yourself which problem you’re solving:
- Do you want the app unavailable at all? Use restrictions.
- Do you want less time in the app? Use App Limits.
- Do you want to stop reinstalling? Block app installation.
- Do you want safer browsing and platform use overall? Review wider privacy settings too, including guides on social media privacy settings.
When people say Screen Time “doesn’t work,” it’s often because they used the wrong tool inside it. Apple built a layered system. The control gets stronger when you combine access limits, install restrictions, and a passcode the user can’t override.
Locking Down a Single App with Guided Access
Sometimes you don’t want broad rules. You want the iPad to do exactly one thing for a short period of time.
That’s where Guided Access stands out.
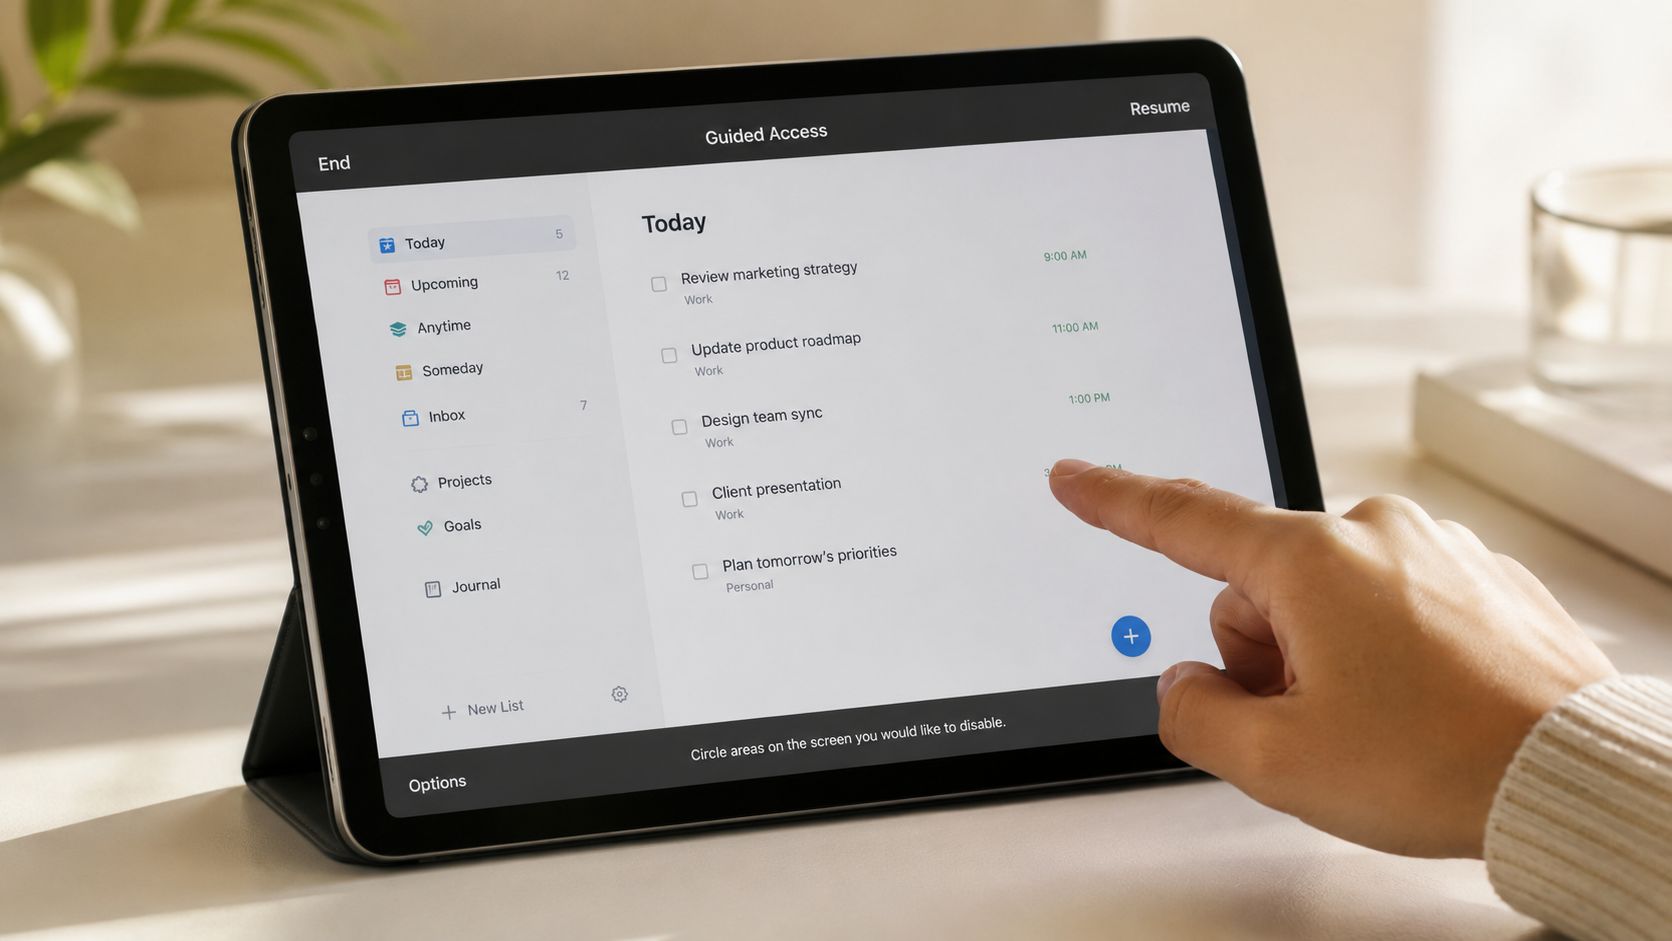
Handing a child an iPad for a math app is the classic example. You don’t want them swiping into messages, opening YouTube, or tapping ads. The same setup also works for check-in desks, point-of-sale use, waiting room forms, classroom stations, and kiosk-style displays.
What Guided Access does better than Screen Time
Guided Access is for single-app lockdown. It’s configured in Settings > Accessibility, uses a separate passcode, and starts or ends with a triple-click of the side or Home button. Users can also disable touch, hardware buttons, motion, and the keyboard from the options screen, as described in this Guided Access walkthrough.
That’s a very different tool from Screen Time. Screen Time sets policy across the device. Guided Access creates a controlled session around one app.
Good use cases for Guided Access
Use Guided Access when you need temporary certainty.
- Educational app time for kids when you want no wandering into other apps
- Guest use when someone needs one function on your iPad but not your photos, mail, or files
- Business kiosks for sign-ins, forms, retail, or product demos
- Focus sessions when you want the iPad to stay inside one work app
If you’re using the iPad in a sensitive environment, it’s also smart to think beyond app access. A locked app won’t help if the device itself has broader compromise issues, so basic checks for spyware on your phone or tablet still matter.
How to turn it on
The setup is short:
- Open Settings
- Go to Accessibility
- Tap Guided Access
- Turn it on
- Set the Guided Access passcode
- Open the app you want to lock
- Triple-click the side or Home button to start the session
You can also adjust whether touch, keyboard, motion, or buttons are active. That extra layer is what makes Guided Access useful for younger children and public-facing scenarios.
Here’s a visual walkthrough if you want to see the flow before trying it:
Guided Access versus lighter alternatives
A lot of people try smaller workarounds first, like moving apps off the Home Screen or offloading them. Those options may tidy the device, but they don’t create a real session lock.
| Option | What it’s good for | What it won’t do |
|---|---|---|
| Guided Access | One-task use, child handoff, kiosks | Manage broad device policy over time |
| Hide or remove from Home Screen | Decluttering personal devices | Stop someone determined from reopening apps |
| Offload or delete apps | Freeing storage or temporary cleanup | Enforce sustained access control |
| Screen Time | Ongoing household or workplace rules | Create a one-app-only live session |
If your goal is “this iPad should only stay in this app right now,” Guided Access is the cleaner answer.
Remote Management for Families and Employers
A block is stronger when it’s managed from somewhere else. That’s true for kids who test boundaries and for employees using company hardware.
For families, the cleaner setup is remote control through the parent or organizer account. For employers, it’s centralized device management. The goal is similar in both cases. The person using the iPad shouldn’t also be the only person controlling the policy.
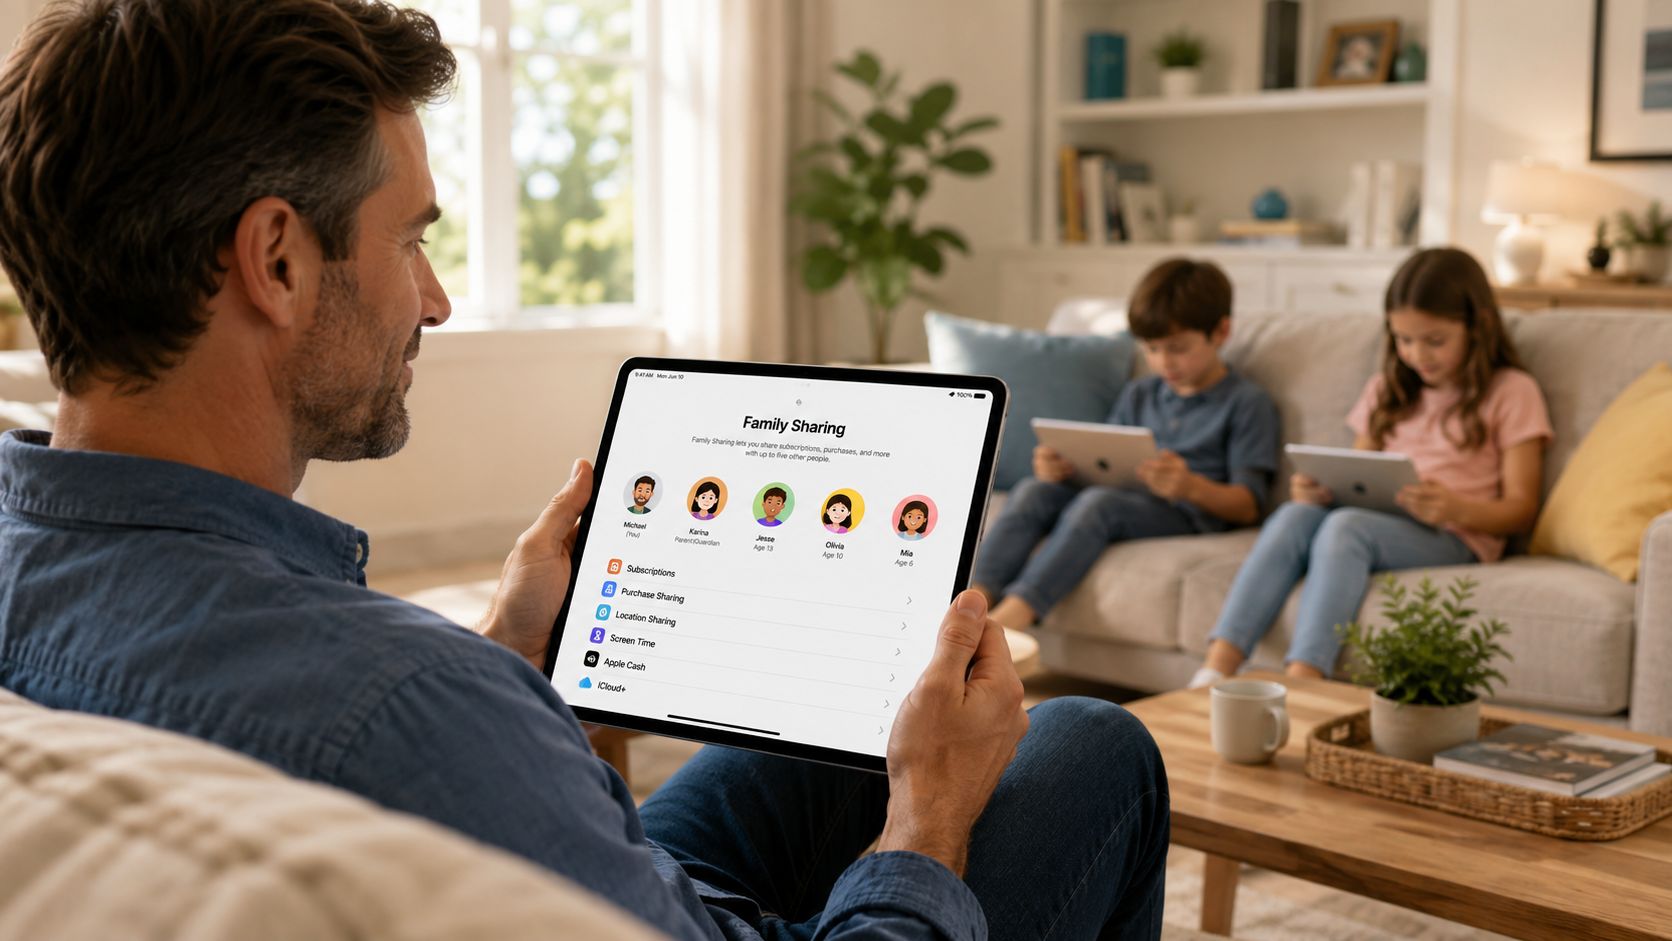
Why Family Sharing is the stronger parent workflow
On child devices, Apple recommends managing Screen Time from the family organizer’s device through the child’s Screen Time account. That approach is more effective because the parent works from outside the child’s iPad rather than relying on settings the child can constantly test or challenge.
This matters in real homes. Children learn patterns fast. If the passcode is reused, if settings are inconsistent, or if one parent changes things directly on the device and forgets what they did, the setup gets messy. Central management reduces that confusion.
A practical family routine often looks like this:
- Parent sets limits remotely from their own Apple device
- Child uses the iPad normally within those boundaries
- Changes require the organizer instead of on-device negotiation
- Rules stay consistent across app use, downtime, and content settings
That’s especially useful when one child uses an iPad for both school and entertainment. You can keep the learning apps available while tightening the apps that create the most friction.
Why this matters for privacy, not just screen time
A lot of parents think app blocking is mostly about behavior. It’s also about data.
Browsers, chat apps, social apps, and gaming apps can expose a child to direct contact, account creation prompts, location sharing, camera access, and ad-driven profiling. Remote management helps you reduce those openings before the child has to make the judgment call alone.
The best parental controls aren’t just restrictive. They reduce the number of risky decisions a child has to make in the first place.
How employers handle this on work iPads
Businesses usually go beyond Screen Time. They use mobile device management, often shortened to MDM. Tools like Jamf or Kandji let IT teams control what company-owned iPads can install, which apps stay available, and how devices behave in work settings.
This changes the conversation. On a personal iPad, blocking apps is a preference or family rule. On a company iPad, it’s often part of security policy.
A business may want to:
- Allow only approved apps for work tasks
- Block entertainment or social apps on corporate hardware
- Push required apps remotely so employees don’t have to configure everything manually
- Protect internal data by limiting unapproved software and risky workflows
If you manage a small team and haven’t thought through device policy yet, these broader cybersecurity tips for small businesses help put app control in context.
What employees should understand about work devices
A company-owned iPad isn’t the same as your personal tablet. If IT manages it, they may be able to enforce restrictions, deploy apps, and remove access when needed. That doesn’t automatically mean they see every personal detail, but it does mean the device exists inside company policy.
That’s why mixing personal life and work life on the same managed iPad often creates tension. Even harmless apps can become a security headache if they connect to personal cloud storage, consumer messaging, or unknown login flows.
For employers, app blocking supports compliance and data handling. For employees, the safest assumption is simple. If it’s a work iPad, use it like a work tool.
Advanced Blocking with Network Level Controls
Sometimes the iPad settings aren’t enough because the primary goal is broader. You want to restrict access across the whole home network, or you want to make certain app services unreachable no matter which device someone picks up.
That’s where network-level controls come in.
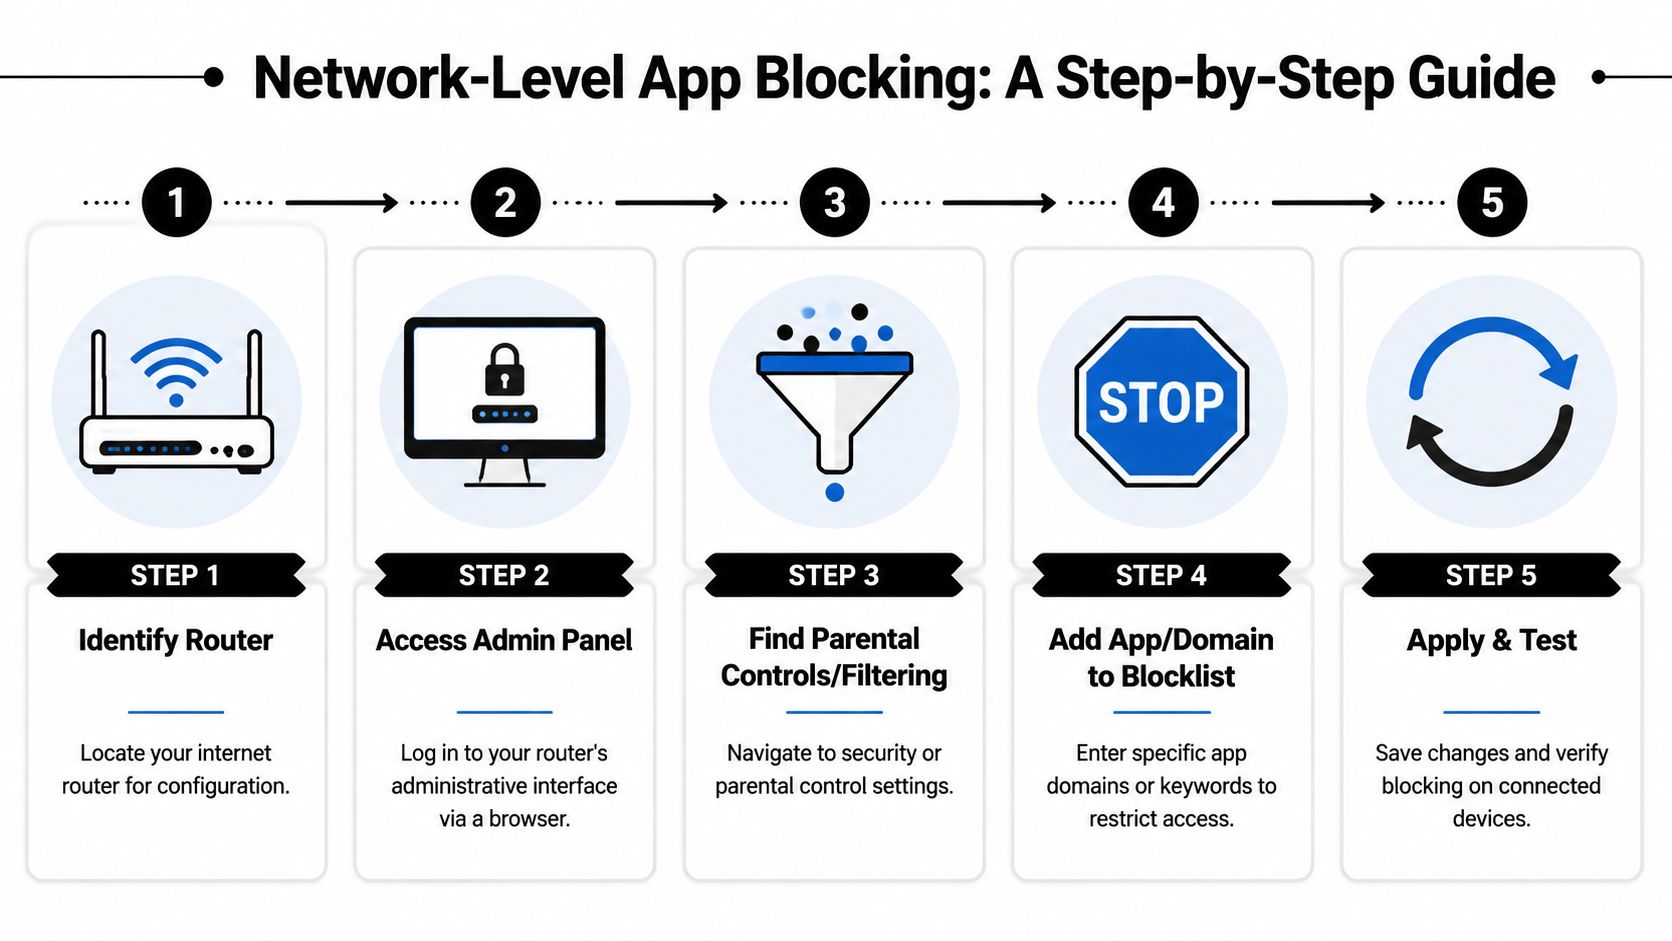
Router blocking and filtered DNS
There are two common approaches.
Router-level controls let you sign into your home router and block domains, keywords, or categories, depending on the hardware. If an app depends heavily on certain web services, blocking those destinations can make the app much less useful or stop core features from loading.
Filtered DNS services work by sending web requests through a filtering layer before the iPad reaches the site or service. Some people use this to block adult content, social platforms, known malicious destinations, or app-related web traffic on selected devices or the full network.
Where network blocking helps most
This method is useful when:
- You want one rule for many devices instead of configuring every iPad, phone, and laptop separately
- You want backup enforcement in case someone changes settings on one device
- You care more about access to online services than about the app icon itself
It’s also relevant if you’re thinking about device traffic and privacy more generally. A guide to iPhone VPN configuration can help you understand how network routing choices affect what devices can reach and how that traffic is handled.
The tradeoff
Network-level blocking is powerful, but it isn’t precise in the same way as on-device controls.
| Strength | Limitation |
|---|---|
| Covers multiple devices at once | Usually works only on that network unless you extend it elsewhere |
| Can disrupt app access even if the app is installed | May not block every part of a complex app |
| Good as a second layer behind iPad settings | Less tailored to one child, one schedule, or one workflow |
Network blocking changes what the iPad can reach. It doesn’t replace local controls that manage what the user can open, install, or request on the device itself.
For many households, the best answer is a layered one. Use Screen Time on the iPad. Add network filtering for shared Wi-Fi. That way, you’re not betting everything on a single switch.
Pro Tips and Key Questions on App Blocking
The strongest setup is never just technical. It combines the right settings, the right passcode habits, and clear expectations about why the rules exist.
If you’re blocking apps for a child, state what the boundary is protecting. Privacy, sleep, focus, and age-appropriate use are easier to accept than a vague “because I said so.” If you’re blocking apps for yourself, be honest about the trigger. Individuals rarely need every app banned. They need a device that performs the job they want it to do.
A few rules that make blocking hold up better
- Use a separate admin mindset. Don’t reuse the device passcode as your Screen Time or Guided Access code.
- Match the tool to the goal. Time limits help with habits. Restrictions help with access control.
- Close the reinstall loophole. If installs are still open, the block is weaker.
- Review the whole risk path. The app may be the issue, but browsers, purchases, and account changes often create the bigger gap.
Common questions
Can someone bypass app blocking on an iPad?
Sometimes, yes. A common pitfall is confusing App Limits with true blocking. Setting a 1-minute limit with “Block at End of Limit” can interrupt access, but it’s still a time-cap system rather than a hard deny list, and it’s easier to bypass if the Screen Time passcode is known or the device isn’t managed through Family Sharing. That distinction was noted earlier when comparing methods.
Is deleting an app the same as blocking it?
No. Deleting removes it for the moment. Blocking is about preventing access or preventing the app from coming back easily.
If I remove an app from the Home Screen, is that enough?
Usually not. That changes visibility more than control. It may reduce casual tapping, but it won’t stop a determined user.
Does blocking an app delete the account tied to that app?
No. Blocking access on the iPad doesn’t erase the online account, old posts, stored data, or public profile connected to that service. The app may disappear from daily use, but your digital footprint can still exist elsewhere.
A blocked app can stop future use on the device. It won’t automatically clean up what the account already exposed online.
That’s why app blocking should be part of a wider digital safety routine. Device controls help with what happens next. Privacy reviews help with what’s already out there.
Blocking apps on an iPad is a strong first step, but it only controls access on the device in front of you. It doesn’t show you what accounts, profiles, breached data, or public information may already be tied to your name, email, phone number, or usernames. If you want a clearer picture of your online exposure, try the free checker from Digital Footprint Check. It’s a practical next step for parents, professionals, and anyone serious about digital privacy.